
 Unfortunately the jacket wasn't anywhere near finished in time for our trip and was put aside after we got home at the end of May in favor of more summery patterns. With the weather turning fallish around here, I decided I better get it finished (I hate UFO's, don't you?). When I had last left off, I was having trouble with getting the sleeve in. Using the traditional methods never seem to work for me and always result in a puckered mess, this was no exception. Thankfully I had watched a wonderful webcast by the smart and talented Peggy Sagers of Silhouette Patterns about factory techniques for making blouses. In this webcast, she demonstrated how get a sleeve into a blouse in the most amazing and effortless way. I was sold and decided to try it on my recent UFO red blouse. It worked so awesome, I decided that I would try it on this jacket and by golly, it worked again like a charm!
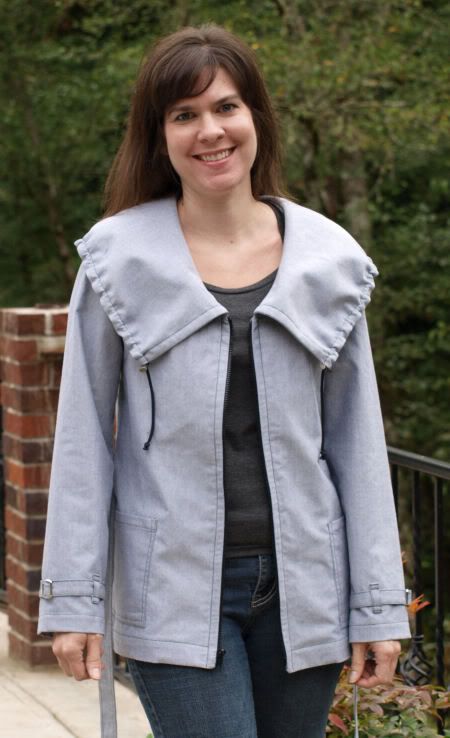 The condensed version of how to set the sleeve in via Peggy's way goes like this:
1. Reduce the seam allowance of the sleeve cap and the bodice sleeve holes on your front and back bodice pieces to 3/8" (aka, shave off 1/4" seam allowance in those areas if you have a commercial pattern with 5/8" seam allowances).
2. Place the sleeve piece towards the machine bed and place the bodice piece on top.
3. Sew or serge in place!The beauty of this method is that the feed dogs gather the fabric for you so there is no basting or fiddling required and you get a smooth sleeve! Now I have only tried this twice, but I intend to try it again soon when I make a desperately needed blouse. I'm not as gutsy as Peggy just serging it it right away as I did find comfort in finding the center point of the sleeve and pin it to the shoulder seam just to make sure everything stayed lined up and then sewing it on my sewing machine first before using the serger to finish the seam.
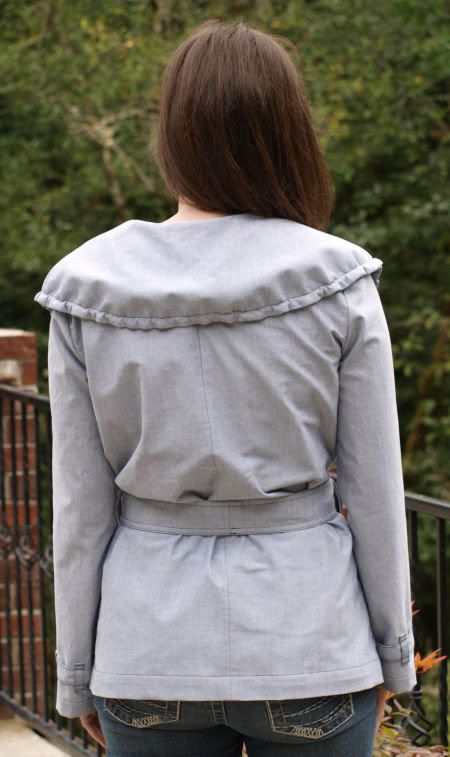
 So here is the finished product. I'm super happy with how it turned out and think it will be a great fall and spring transition piece in my closet.
 I did run into two errors while making the pattern, but directly emailed Ms. Tueller about them and found her to reply extremely quickly. She had added them to the correction page on her website, but the errors were:
1. The back facing says cut two on fold, but you only cut one.
2. The sleeve band piece says cut two on fold, but you cut two NOT on the fold. I did recut them this way, however I found them to be too short so I added about an inch to them. Upon another email with Ms. Tueller, I found out the sleeves are actually supposed to be a little gathered so if I would have gathered them, the length would have been perfect.
 Here is a modified version of my review from Pattern Review:
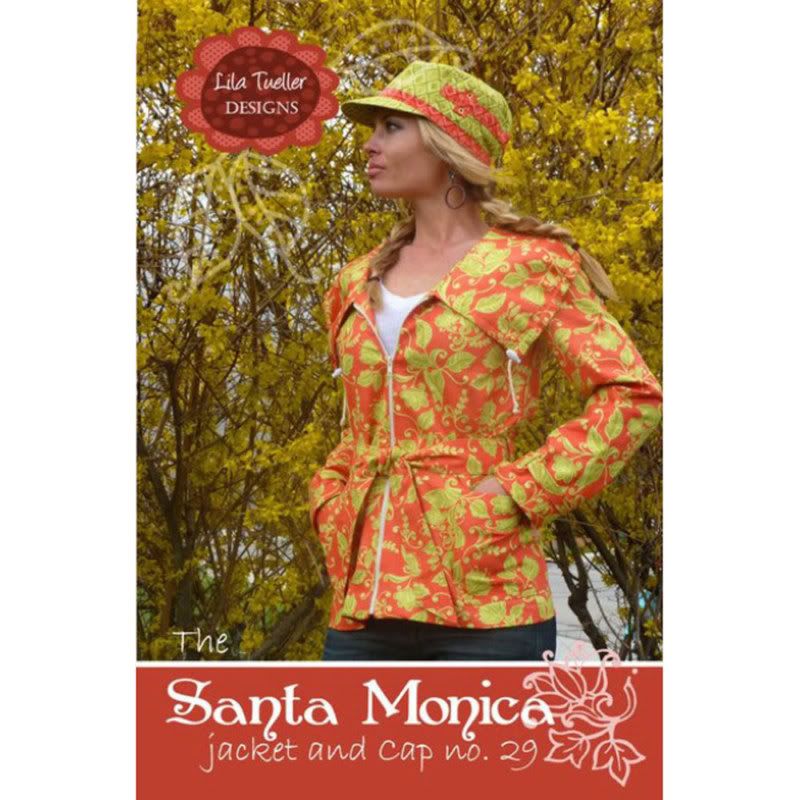
Pattern Description: Ladies jacket with oversized collar and cap.
Pattern Sizing: xs to xl based on bust and hip sizes, I made a small.
Did it look like the photo/drawing on the pattern envelope once you were done sewing with it? Yes!
Were the instructions easy to follow? Yes, they are very clear with lots of professionally drawn diagrams and good instruction. The pattern is on the typical tissue paper.
What did you particularly like or dislike about the pattern? I saw this jacket at Fabric Depot in Portland, OR back at the beginning of May. It was in a pretty white summery fabric and hanging on a dress form. I instantly fell in love with it and decided to try it on and see what I thought. Once I tried it on, I knew I had to make it. We were leaving for a three week trip a week later so I had hoped to get it finished to take along. Well that didn't work out at all and am just now finally getting it finished. So what do I like about the design? I like the uniqueness of it. I love the big collar and how it's just a chic jacket that can be worn a lot of the year here in the Pacific NW.
Fabric Used: A chambray from the Lisette line at Joann's (it's a black & white weave).
Pattern alterations or any design changes you made: I made my usual 1/2" broad back adjustment. Also I didn't use all the bias tape to finish the seams. I started out doing that, but it frustrated me so moved to serging instead. I did finish the facing and hem with bias tape for a nice finish tho. Lastly, I really didn't care for her zipper instructions so I did it my own way.
Would you sew it again? Would you recommend it to others? Making this jacket feels like it took me an eternity, but in reality it really wasn't too bad to sew, I just drug it out for months and months. So yes, I'd definitely sew it again. It wasn't difficult by any means and the instructions are very complete. Yes, I'd recommend it if it's a style you're after.
Conclusion: Cute and unique jacket, just finally glad it's finished so I can wear it!


6 comments:
Fabulous jacket. Thanks for the pattern review!
I like your jacket better than the one on the pattern envelope!
I love your version in a more neutral fabric. It's a great fit.
The jacket looks wonderful on you!
Cute jacket! That fabric will be very versatile!
Melissa!!!
I'm embarrassed to say that I didn't know you were still blogging, or else I'd have DEFINITELY kept up with you!!
Your jacket is darling! I'd love to have one, I think I'm going to have Seamstress Samantha sew one for me! She can sew pretty much anything. We loved the idea of keeping a sewing journal, I think she's going to start doing that too.
Yep, comin' home!!! Sooooo excited! Wanna meet for lunch soon?? CALL ME or email me! Love ya!
Post a Comment